How to Verify Your Domain in Google Workspace (Formerly G Suite)
Why verify?
Once you verify your domain's ownership, you can start using Gmail, Google Drive, and all the other services included with your Google Workspace account.
If you have already signed up for Google Workspace, you will receive an email that says, "Activate Google Workspace." Complete the setup process. Part of the setup process is verifying your domain ownership.
How Do I Verify?
- Get your unique verification record.
- Add the verification record to your DNS records.
- Tell Google to verify.
Get your unique verification record.
- Log in to your Domains Dashboard.
- On the dashboard, select the domain where your Google Workspace is located.
There are two views in the Domains dashboard - the Card and List views. Click on the view icons to switch to your preferred view.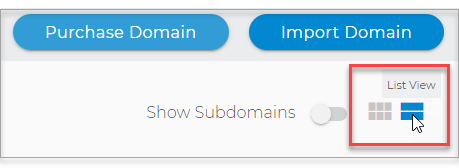
- Choose the domain you wish to modify.
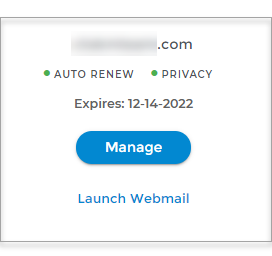
In the Card view, click the domain's Manage button.
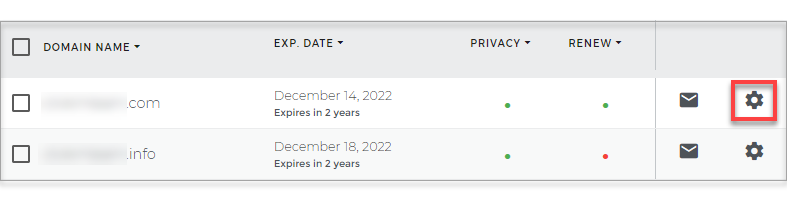
In List view, click the domain or its gear icon on the right-hand side.
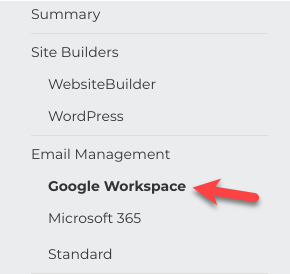
- Click on Google Workspace in the left-hand menu.
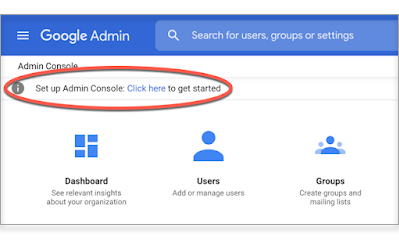
- Under Quick Access, click on Admin.

- At the top of the Admin console Home page, click on Click here to continue setting up.
Click Verify. - Click Continue to verify your domain with a TXT record (most common). You can also use other methods of verification by clicking Switch verification.
- Click Copy to copy your unique verification record.
Add the verification record to your DNS records.
- Log in to your Domains Dashboard.
- On the dashboard, select the domain where your DNS is situated.
There are two views in the Domains dashboard - the Card and List views. Click on the view icons to switch to your preferred view. - Choose the domain you wish to modify.
In the Card view, click the domain's Manage button.
In List view, click the domain or its gear icon on the right-hand side.
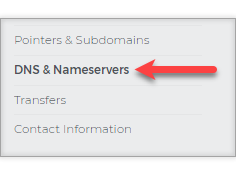
- On the left sidebar, click on DNS & Nameservers.
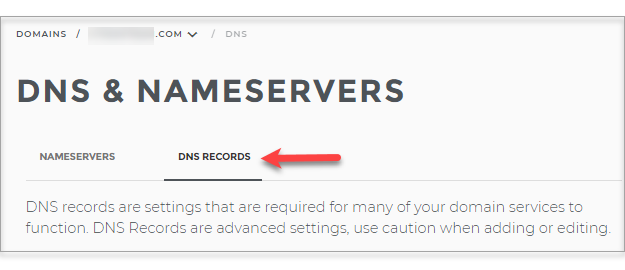
- On the DNS & Nameservers page, select the DNS Records tab.
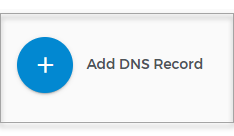
- Add a DNS Record by clicking the blue + button.
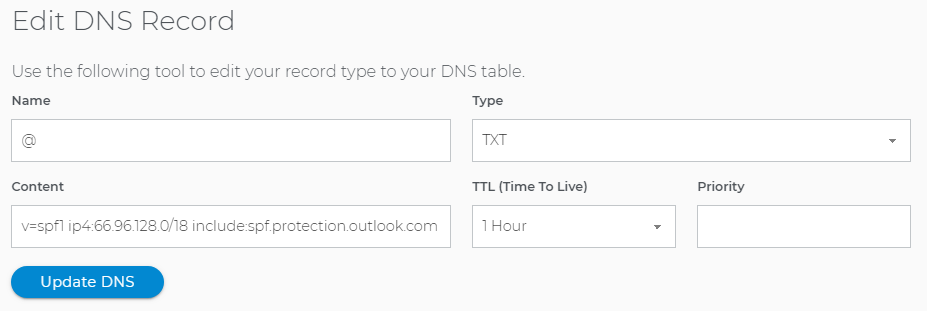
Add a TXT (most common)
- In the Name field, put the @ sign.
- From the Type list, select TXT.
- In the Content field, paste the entire verification record that you copied from your Google Admin Console.
- TTL, is usually safe to set in the 1 hour to 12-hour range.
- Leave the Priority box blank.
- Click Add DNS.
Add a CNAME verification record.
- In the Name field, put the @ sign.
- From the Type list, select CNAME.
- In the Content field, paste the long string of text and numbers that you copied from your Google Admin Console.
- TTL, is usually safe to set in the 1 hour to 12-hour range.
- Leave the Priority box blank.
- Click Add DNS.

Back to top
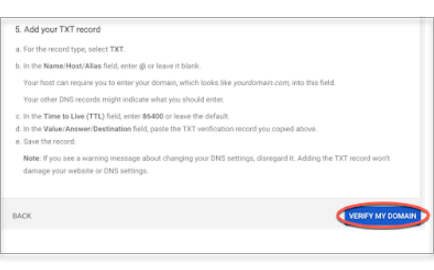
Tell Google to verify.
- Go back to your Admin Console.
-
Navigate to Verify your domain page.
- At the bottom of the page, click Verify my domain.
.