Changing IIS Settings: Server Status (Foundation)
The Server Status has its own default settings. By following the steps outlined below, you can configure the IIS Settings based on your preference.Here are the Server Status settings for the following applications:
- Accessing the IIS Administration Console (initial step)
- Website Status
- Application Pool
- Application Pool Mode
- Load User Profile
Note: Setting changes may take up to 2 hours to take effect.
Accessing IIS Administration Console
Follow the steps below to update your Server Status for different applications.- Log in to Foundation and go to the Hosting Tab.

- From the Windows Tools on your left navigation menu, select the IIS Administration Console option.
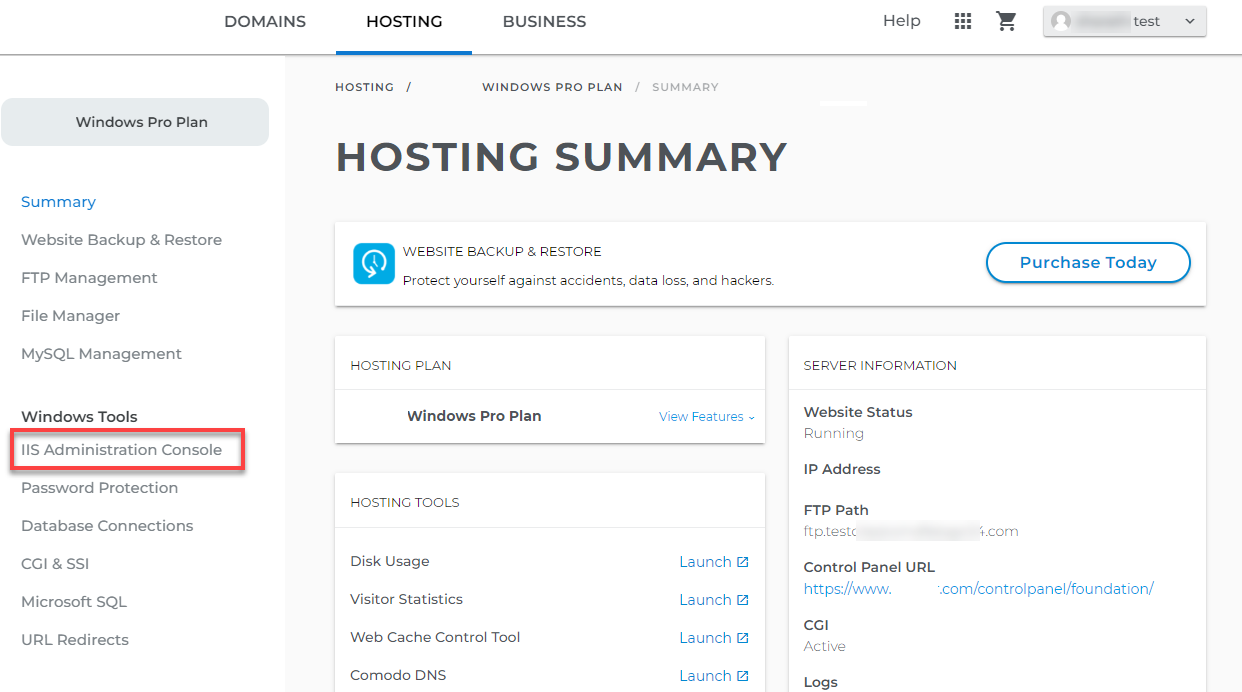
- Inside the IIS Administration Console page, locate the Server Status tile and make the necessary adjustments.
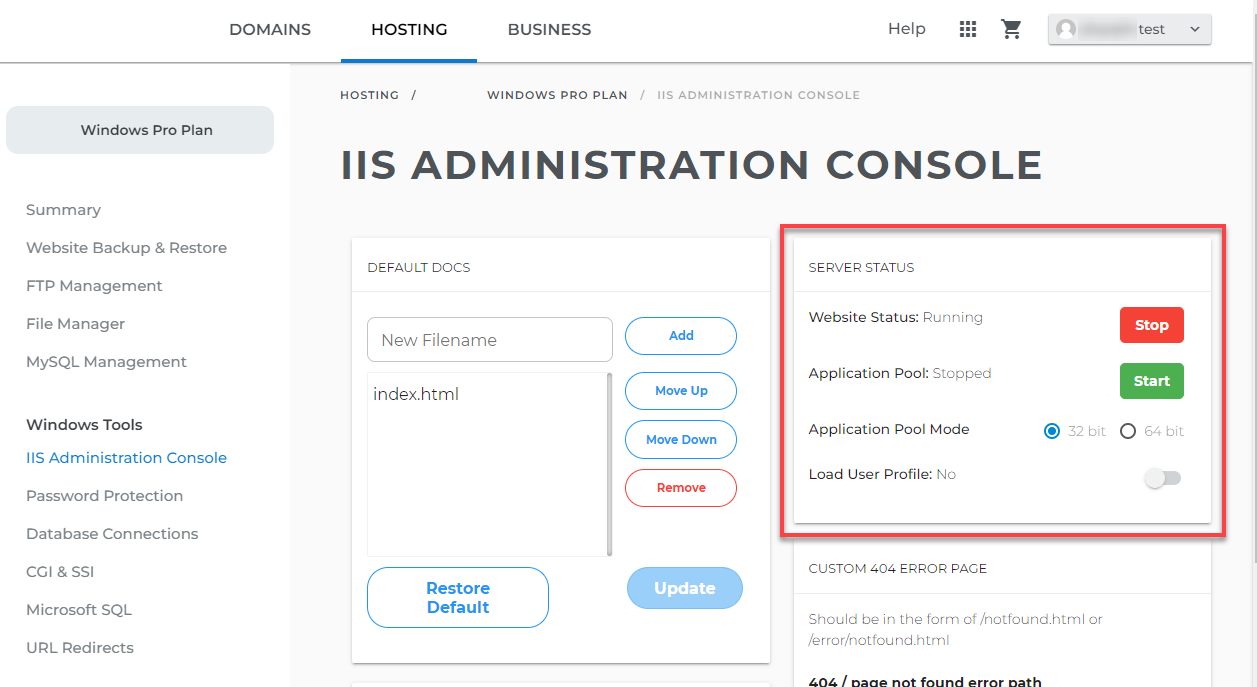
Website Status
Initially, the default Website Status is set to Stopped. Follow the steps below if you wish to change the default status.- Go to the Server Status tile.
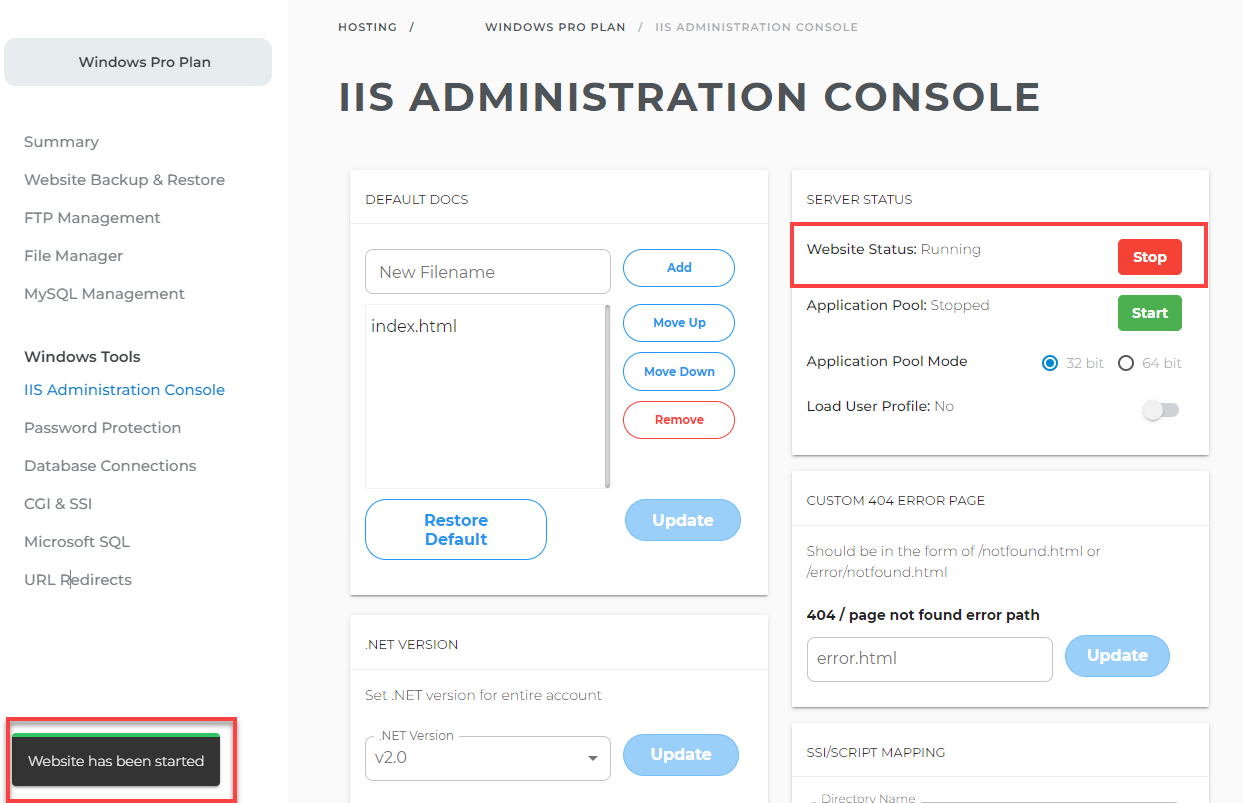
- Next to Website Status, click on Start.
- A notification at the bottom left of the screen will show that Website has been started.
- After changing the status, the newly set status, Website Status: Running, will be displayed.
Note: If the Application pool status is Running, the stop button will appear. If the Application pool status is Stopped, the start button will appear.
Application Pool
Application pool in Internet Information Services (IIS) is a mechanism designed to comprise a group of web applications corresponding to one or more worker processes (w3wp.exe) sharing a common configuration. Application pools help simplify software management and ensure better application performance.
The default status of the Application Pool is set to Stopped. Follow the steps below if you wish to change the default status.
- Go to the Server Status tile.
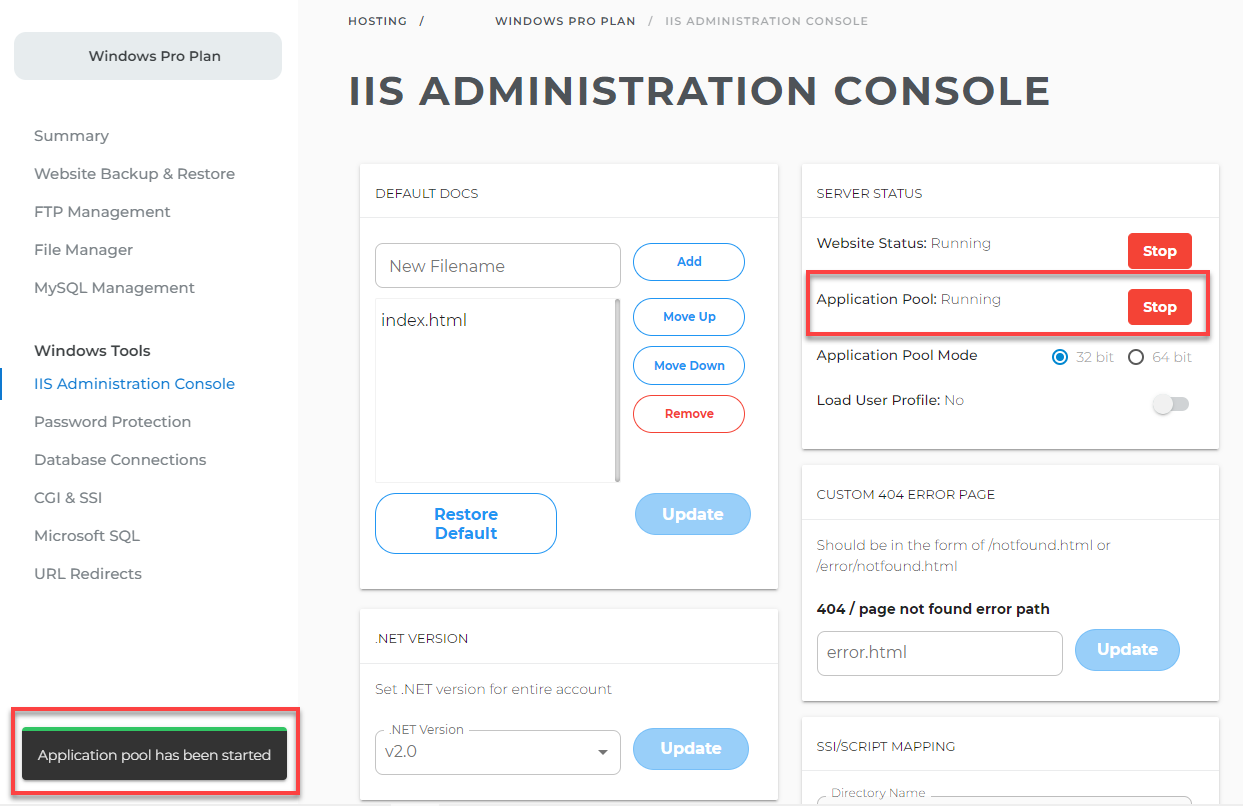
- Under Application Pool, click on Start.
- A notification at the bottom left of the screen will show that the Application pool has been started.
- After changing the status, the newly set status, Application Pool: Running, will be displayed.
Note: If the Application pool status is Running, the stop button will appear. If the Application pool status is Stopped, the start button will appear.
Application Pool Mode
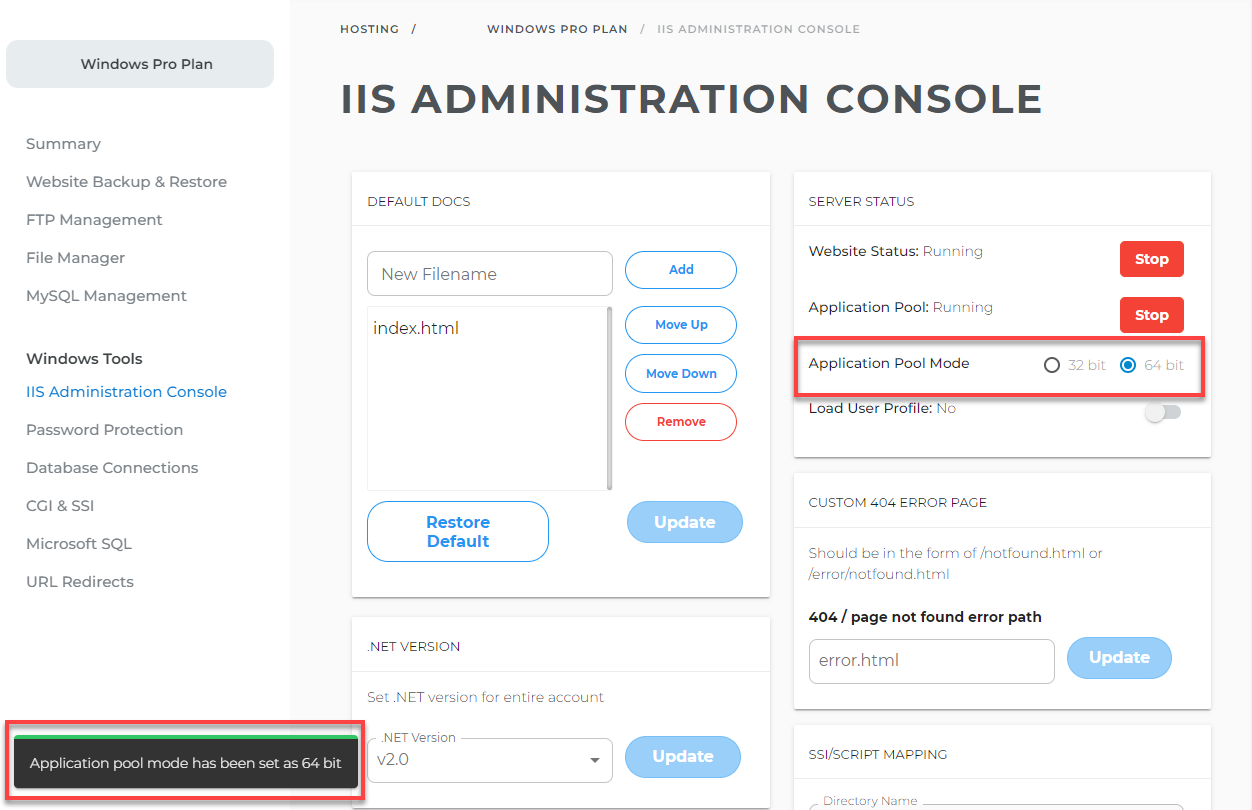
To set the Application Pool Mode, follow the steps outlined below.- Go to the Server Status tile.
- There are two options showing 32 bit & 64 bit.
- If you wish to set 32 bit or 64 bit mode, click the corresponding radio button.
- After clicking on the radio buttons respectively. a message will show that the Application pool mode has been set as 32 bit / 64 bit.
Load User Profile
IIS never loads user profiles by default, it’s defaulted to off status to keep the behavior consistent, and an administrator has to opt-in to it.
Note: The Load User Profile setting only applies to user accounts. Service Accounts like Network Service and Application Pool Identity have special handling.
- Go to the Server Status tile.
- The default status is Disabled. If you wish to change the status, click on the toggle button.
- You can set the status as Enabled or Disabled. After clicking on the toggle button, the confirmation messages will show and the respective status will appear beside the title.
